Vidchecker QC Failure - Chroma/Luma Levels
Because The Library QC is designed to assess broadcast-quality master files, it also has to make sure that files are broadcast safe. This means that the Vidchecker QC algorithm is checking a combination of elements including RGB/Gamut and Luma/Gamut. Excessive Chroma and Luma levels (i.e. if your video contains too high peaks between their colours/highlights) will fail the Vidchecker QC.
This article is designed to help you fix/alter these levels to ensure your video is Broadcast Safe and passes the Vidchecker QC. It uses screenshots and guides from Adobe Premiere and then Final Cut Pro, so if you are using different editing software to those, you may have to use different techniques than we would recommend.
Some important terms to know:
Chrominance: the colour range of the video (measured according to the EBU R103 specification). Also known as 'Chroma' levels.
Luminance: the brightness of the video (measured according to the EBU R103 specification). Also known as 'Luma' levels.
EBUR103: European Broadcasting Union's recommendation concerning permissible tolerances of video signals in digital television systems. This is used to standardise television across channels and technical specifications.
Saturation levels: saturation is affected by luma levels (so your colour will be brighter or not depending on your lighting).
Broadcast Safe: a file or level acceptable for broadcasting – i.e. this file would pass Vidchecker QC and be considered technically approved (though it will, of course, still require full copy clearance).
Some basic rules:
A video limiter will lock chroma/luma levels and should be applied to strong light effects like a lamp or reflection – but using it on a specific object that the camera focuses on may risk distorting the detail.
White levels must not exceed 100% and black levels must not exceed 0%. Ideally stay between 98% to 2% at least to be safe. Chroma saturation levels should stay around 75%.
Generally, the broadcast safe effect/filters should be applied to an otherwise completed project, after any other colour grading work is complete.
Adobe Premiere steps:
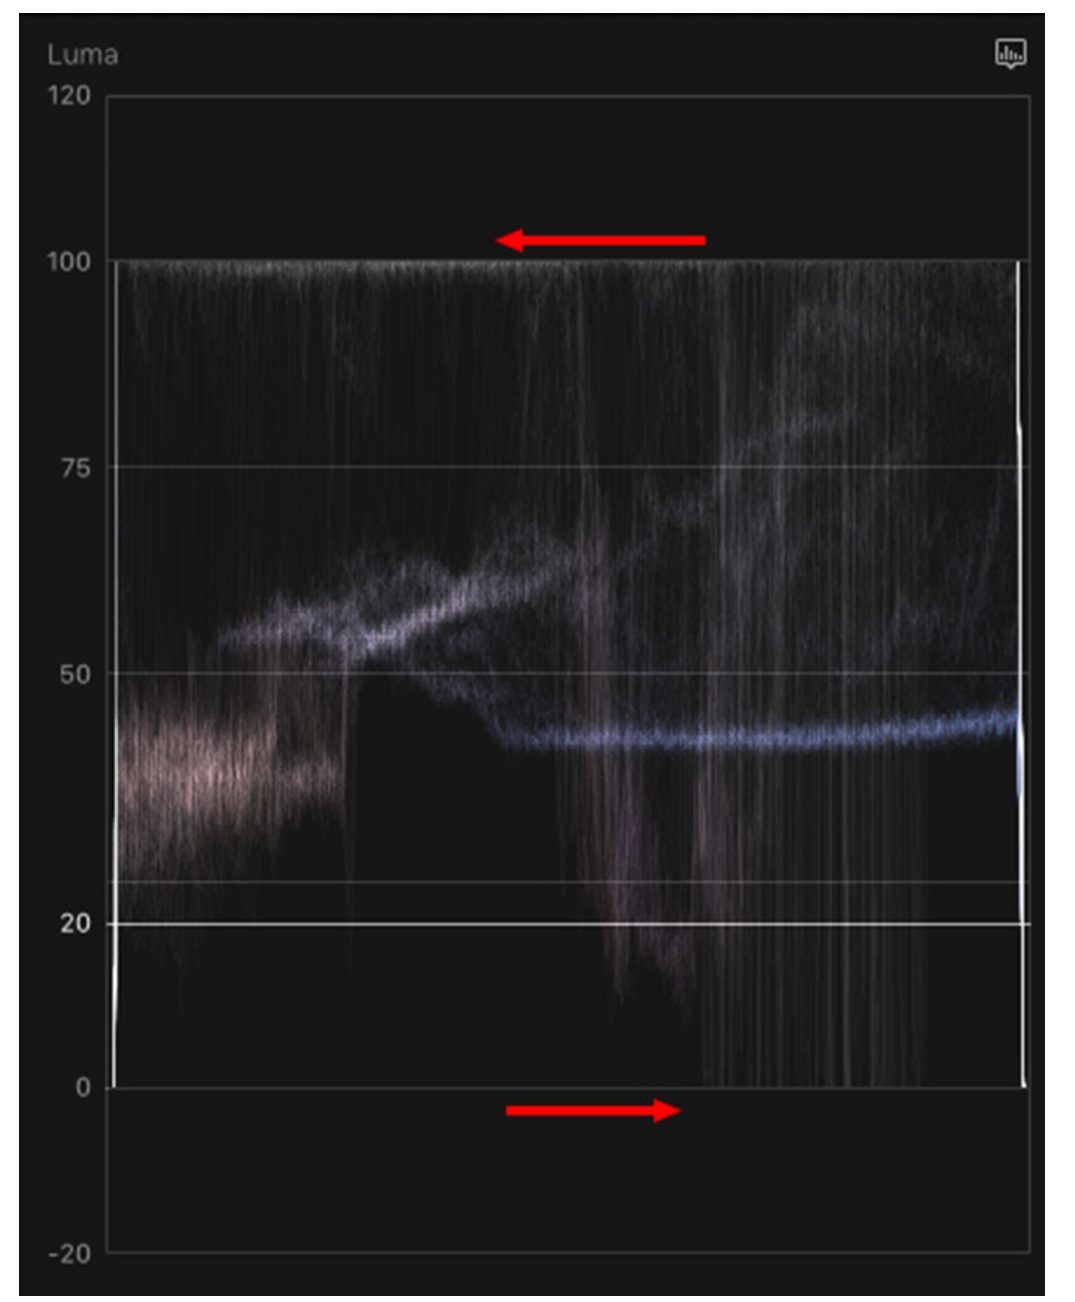
Here’s a before image:

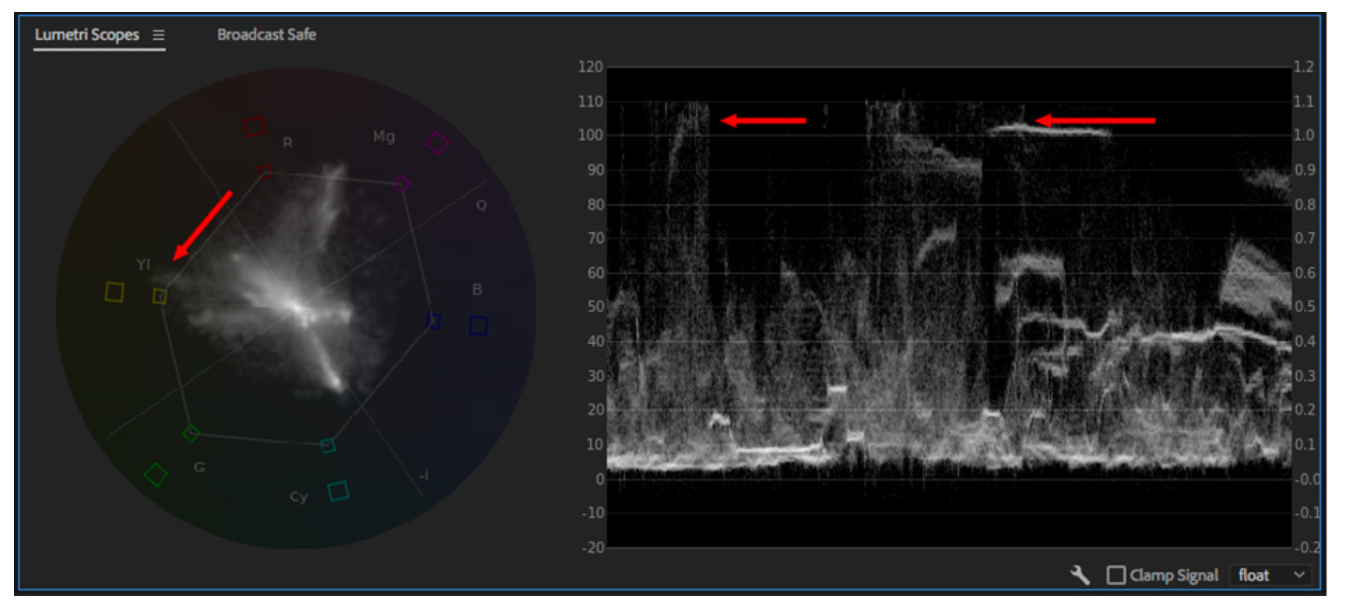
You can see the levels are higher that the 100 point and outside of the advised 75% colour spectrum.
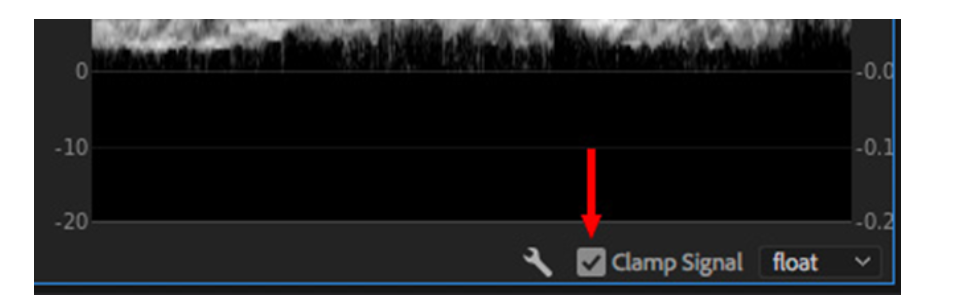
At the bottom of the Lumetri Scopes, make sure the ‘Clamp Signal’ box is checked so as to not change the video levels in your file. We would recommend applying the Video Limiter (the effect we’ll be using) on a separate Adjustment layer placed above all other clips. (You can do this by right clicking in the project panel and selecting ‘New Item’ then ‘Adjustment Layer.’)
You should then find ‘Video Limiter’ within the Effects panel (within the colour correction folder or by searching directly for it within the Effects panel search bar) and drag it over to the Adjustment Layer.
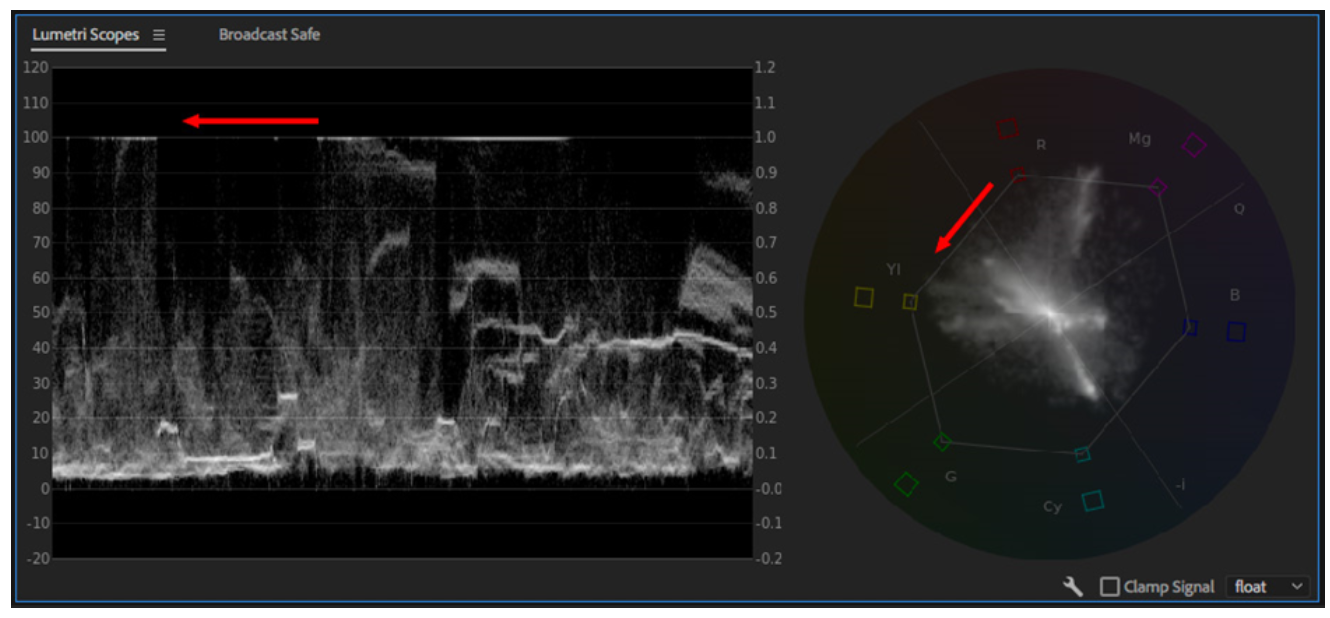
After this Broadcast ‘clamp' is applied, you can see the difference in the ‘After’ image below:

Final Cut Pro X steps:
Here’s a before image:
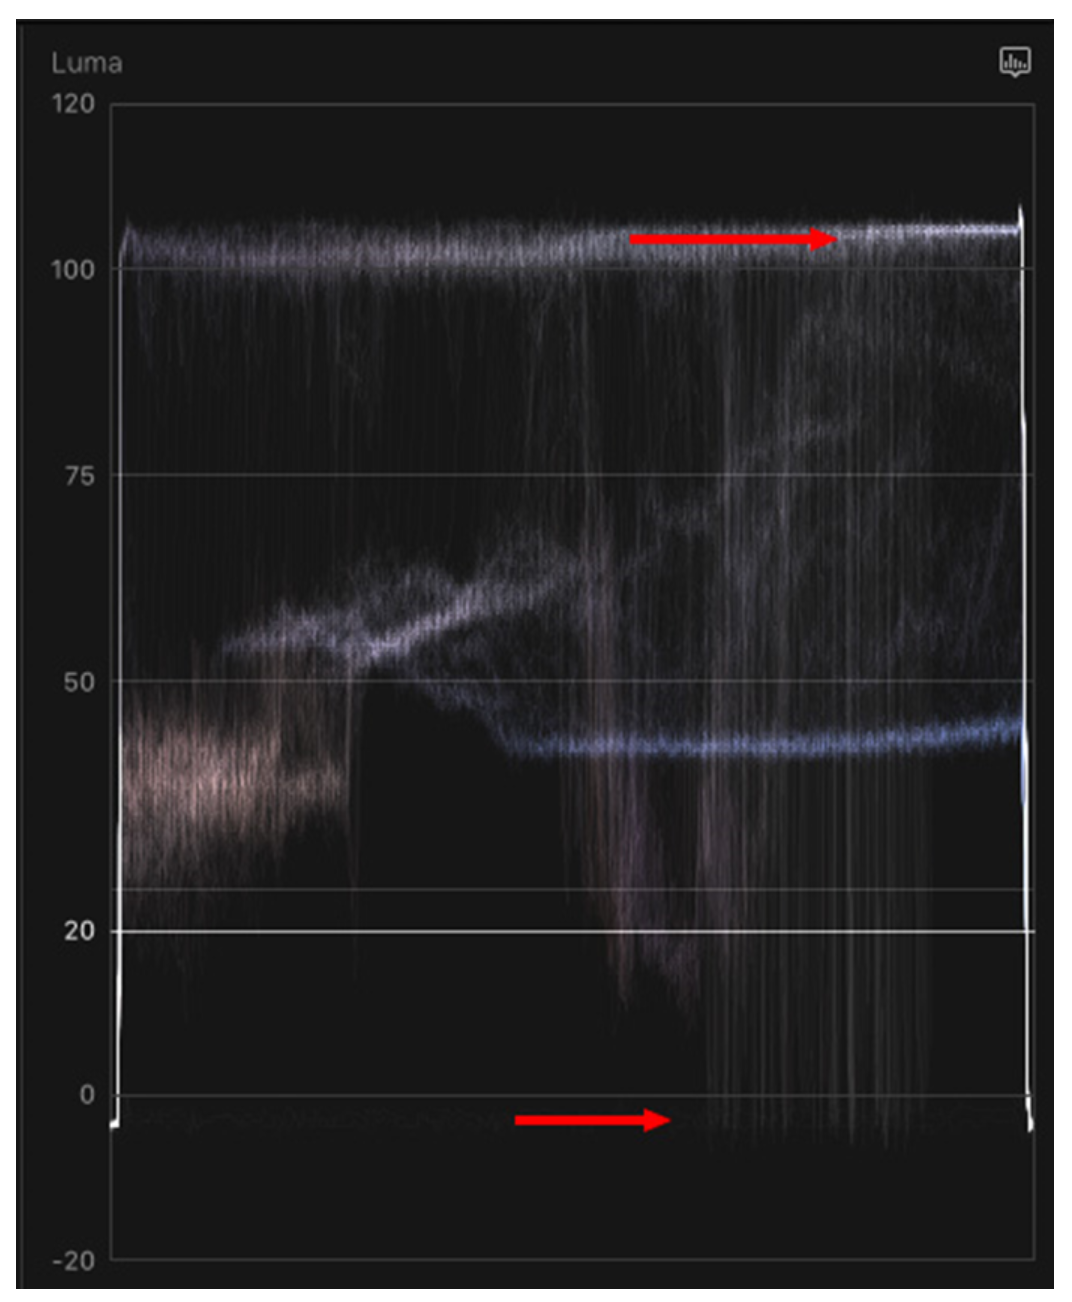
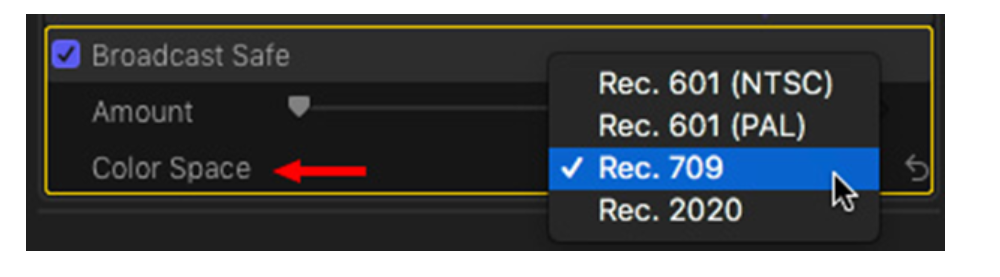
You can see there are levels beyond both the 100% and 0% range. You will then need to apply the Broadcast Safe effect to either all the clips in the timeline or an Adjustment Layer if you have one added. Select and then go to ‘Effects Browser’ then ‘Colour’ then ‘Broadcast Safe.’ You will need to double-click it to apply to all selected clips. You will see a drop-down option with the effect to select the colour limit – ‘Rec. 709’ should be safe for broadcasting.
Here’s the after: